Domain installation Registered E-mail
- 5 Minutes to read
- Print
- DarkLight
- PDF
Domain installation Registered E-mail
- 5 Minutes to read
- Print
- DarkLight
- PDF
Article Summary
Share feedback
Thanks for sharing your feedback!
This document has been compiled in the context of installing the Registered E-mail plug-in within a Windows Domain Environment. The installation of applications/plug-ins on a Citrix server is the same as on a 'normal' Terminal Server environment.
However, this document has been written to answer some questions and to illustrate some minor differences.
Preparation
The plug-in can only be installed when the following conditions are present.
.NET Client Full 4.0
This software consists of a subset of .NET Framework 4 which is optimised for Client Applications.
This package is available for download from:
http://www.microsoft.com/en-US/download/details.aspx?id=24872
Visual Studio Tools for Office
This package is necessary for running applications in Microsoft Visual Studio. It is provided free of charge by Microsoft.
The package can be downloaded from:
https://www.microsoft.com/en-us/download/details.aspx?id=56961
De installatie
For a standard installation there is no difference from the regular installation. Therefore, the document "Installation Guide Registered E-mail" can be used.
https://www.aangetekendmailen.nl/plugin/AangetekendMailen_Plugin.msi
Deployment from Active Directory
The regular MSI deploys the Registered E-mail software automatically and places the basic keys in the registry. It is also possible to place these keys in the registry manually with specific set preferences. For this purpose we have a special domain MSI available:
https://www.aangetekendmailen.nl/plugin/AangetekendMailen_Plugin_domain.msi
MSI installer
The domain MSI installer is identical to the regular MSI in terms of installation. Various parameters can be given to the .msi. A few of these parameters are described below and can be used by a system administrator to perform a "silent" installation without the end-user noticing this.
Option to use a .msi installer:
msiexec /Option
Install options:
Installs or configures a product | |
/a | Administrative install - Installs a product on the network |
/j | Advertises a product - m to all users, u to current user |
Uninstalls the product |
Display options:
/quiet | Quiet mode, no user interaction |
/passive | Unattended mode - progress bar only |
/q[n|b|r|f] | Sets user interface level b - Basic UI r - Reduced UI f - Full UI (default) |
/help | Help information |
The following command will install the software without the user's knowledge.
AangetekendMailensetup<versie>.msi" /passive /quietPlug-in available per user
The software is developed in a way that it can be deployed from a GPO. It is also possible to make the add-in available for individual users.
Short explanation
The system administrator ensures that the registry key below is accessible, or inaccessible to users who do not need the plug-in installed.
Standard plug-in:
[HKEY_LOCAL_MACHINE\SOFTWARE\Microsoft\Office\Outlook\Addins\AangetekendMailenAddIn]
CU (Current User) plug-in:
[HKEY_CURRENT_USER\SOFTWARE\Microsoft\Office\Outlook\Addins\AangetekendMailenAddIn]
Add the following keys here:
| Description | REG_SZ | Aangetekend Mailen Plugin |
| FriendlyName | REG_SZ | Aangetekend Mailen |
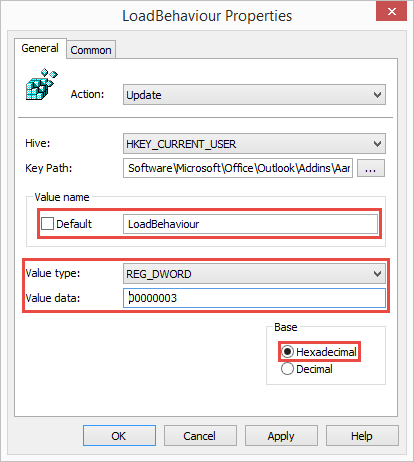
| LoadBehavior | REG_DWORD | 3 |
| Manifest | REG_SZ | file:///C:\Program Files\Aangetekend Mailen\Aangetekend Mailen - Outlook plugin\AangetekendMailen_Plugin.vsto|vstolocal |

Tip: Preferably create a separate Security Group and add the user to the group.
Extended description
The following steps explain how to implement Group Policy Objects (GPOs) for Active Directory when configuring the Registered Mail Plugin within Microsoft Outlook.
To implement the settings, the group policy object is associated with one or more Active Directory containers, such as a site, a domain or an organisational unit. The settings in the group policy object are then automatically applied to the users and computers whose objects are stored in the Active Directory containers. You can configure the work environment for your employees once and then enforce the associated settings through group policy.
This guide is based on a Windows 2012 R2 environment that is configured with an Active Directory role. These steps will be similar to other configurations.
In this example we will assume the following Active Directory structure:
- The domain is called Internal.lan
- The domain controller SVR-001
A member server with the Terminal Server role named TerminalServer1
Step 1: Creating organisational units and assigning computer accounts in them
- In the first step, you use the MMC Active Directory - Users and Computers module to create an organisational unit in the domain hierarchy in which the member servers (Terminal Servers) are placed.
Then move the computer accounts to the relevant new organisational unit.
Creating organisational units and placing the computer accounts in them
1. Click Start, click System Administration and then click Active Directory - Users and Computers. - In the navigation pane, right-click Internal.lan, click New, and then click Organization Unit.
- Type Servers in the Name box and click OK.
- Right-click the newly created Organization Unit Servers, click New, and then click Organization Unit.
- Type TerminalServers in the Name box and click OK.
- In the navigation pane, click Computers.
- In the details pane, right-click TerminalServer1 and then click Move.
- In the Move dialog box, click TerminalServers and click OK.
Once you have done this, your screen will look similar to the following image:
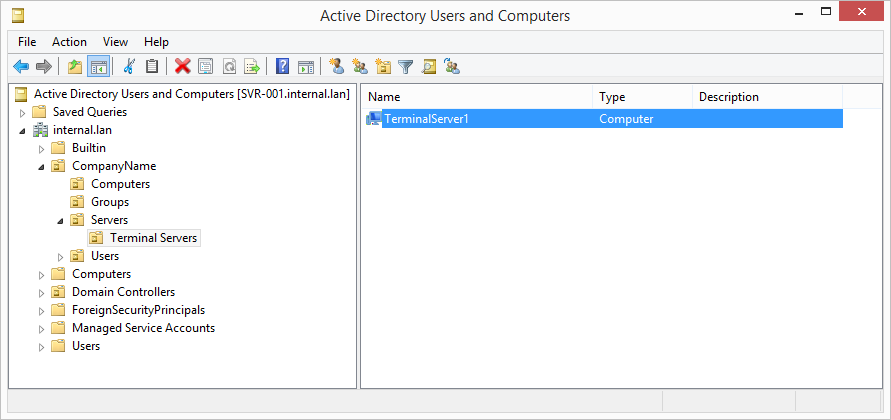
Close the Active Directory - Users and Computers module.
Step 2: Create the group policy objects in which the settings are stored
In this step, you create a new Group Policy object. Because it is not yet linked to an organisational unit, the settings you have configured do not yet apply to computers.
Creating the Group Policy objects
- Click on Start, click on System Administration, and then click on Group Policy Management.
- In the navigation pane Forest: internal.lan, expand Domains and expand: internal.lan.
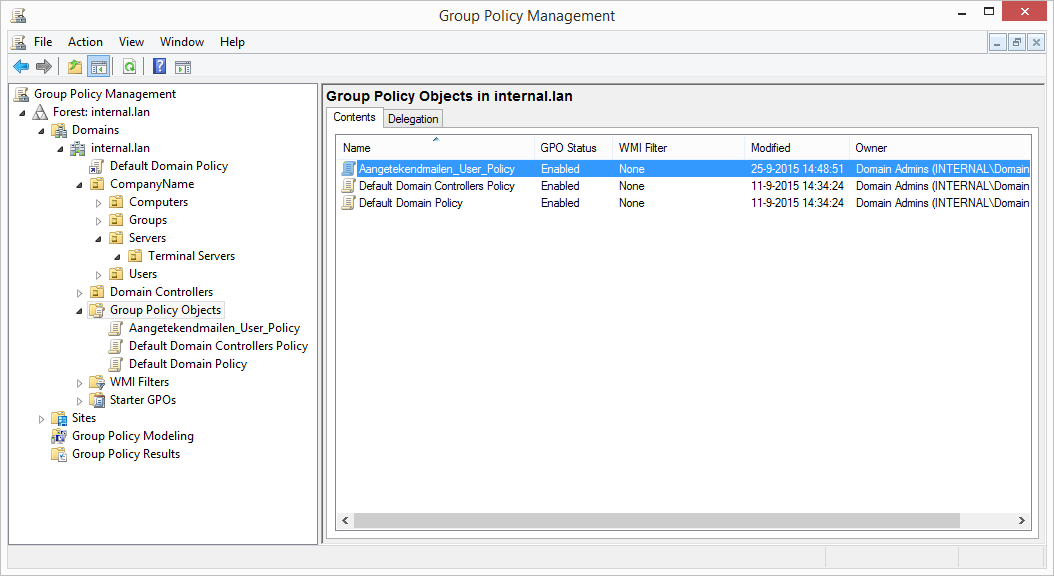
- In the navigation pane, right-click on Group Policy Objects and then click on New.
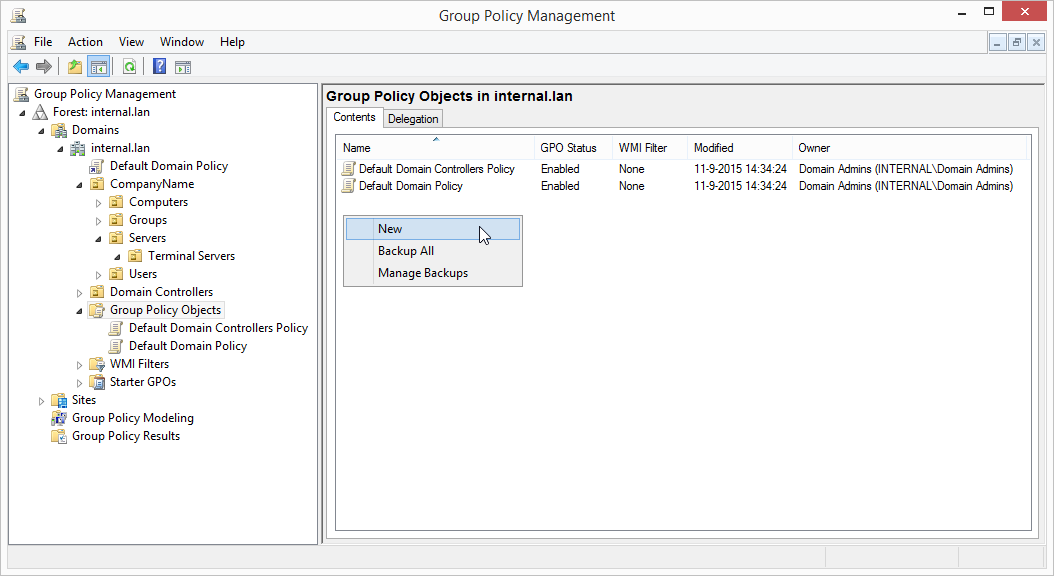
- In the Name box, type the name Aangetekendmailen_User_Policy and click OK.
- Select the Group Policy Objects node and your screen will look like the following image:
Step 3: Adding the Group Policy setting for enabling the Registered Mail Plugin on Terminal Servers
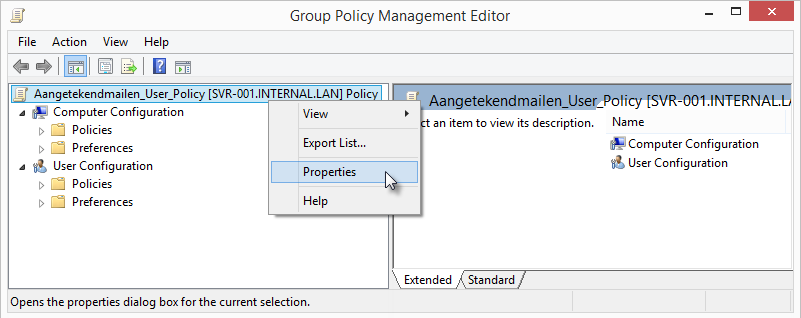
- Click on SVR-001, in Group Policy Management, click on Group Policy Objects, right-click on Signposting_User_Policy and click on Edit.
- In the Group Policy Editor, right-click the top node Policy for Registered Mailing_User_Policy [SVR-001.INTERNAL.LAN] and click Properties.
- Select the Disable Computer Configuration Settings check box and click OK.
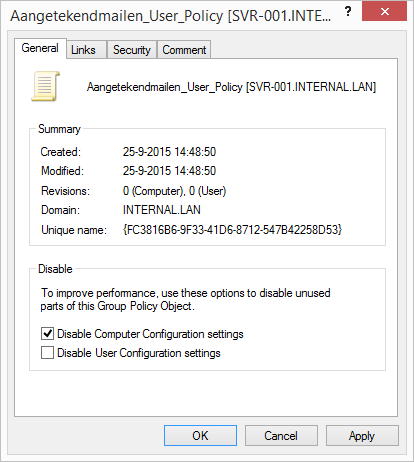
- Click Yes in the Confirm Disable dialogue box and click OK.
- In the console tree, under User Configuration, expand the Preferences folder and expand the Windows Settings folder.
- Right-click on the Registry node or on a collection folder under the node, point to New and select Collection Item.
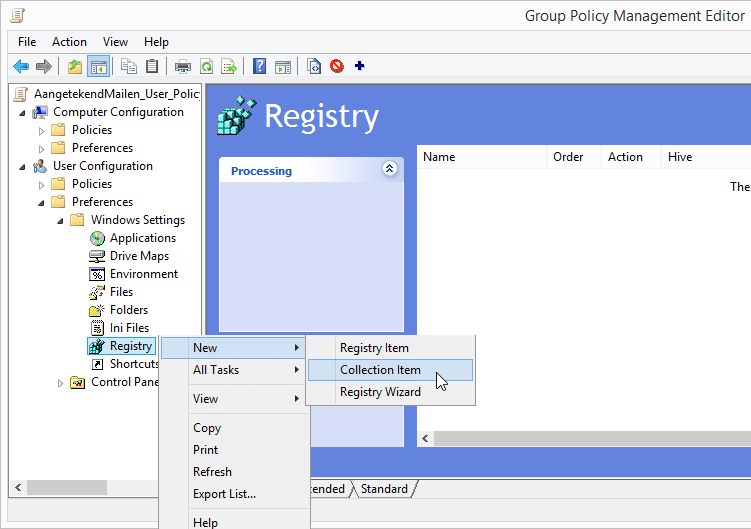
- In the Name box, type the name AangetekendMail and click OK.
- The new collection folder now appears in the console tree.
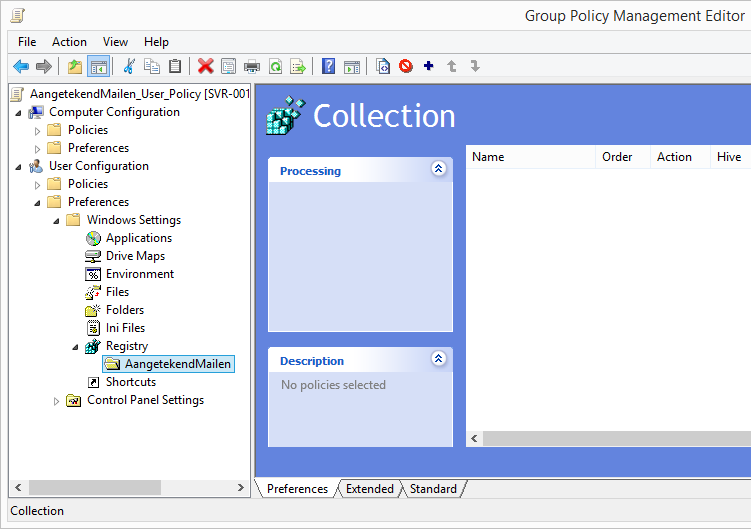
- Right-click on the collection folder, point to New and click on Registry Item to create a registry item in this collection folder.
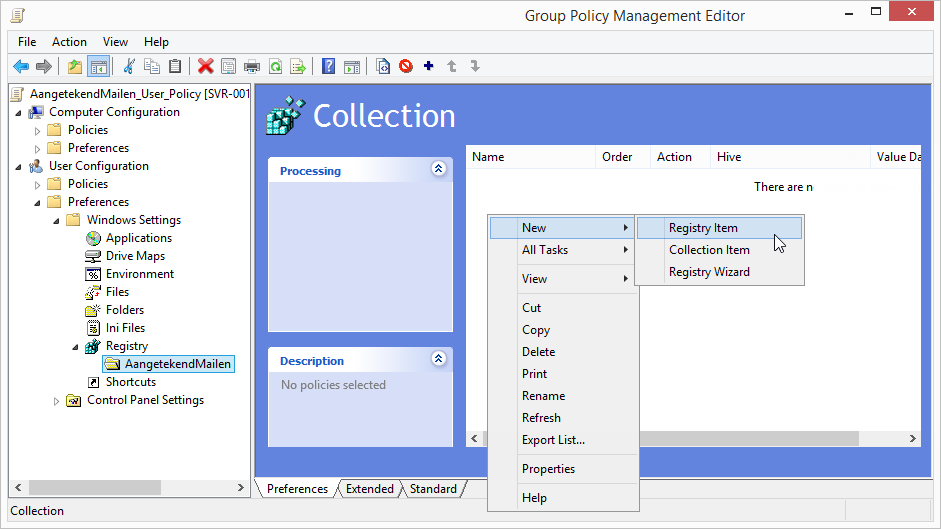
Now take over the settings as shown in the following illustrations:
- Hive: HKEY_CURRENT_USER
- Key Path: Software\Microsoft\Office\Outlook\Addins\AangetekendMailenAddin
Image A:
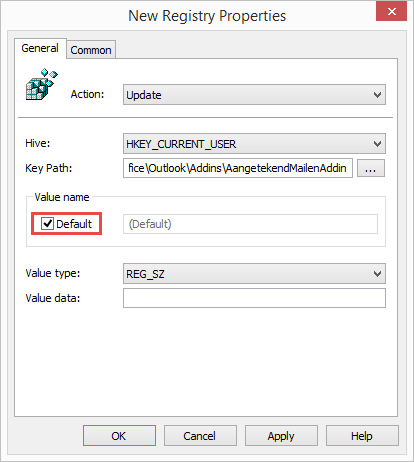
Image B:
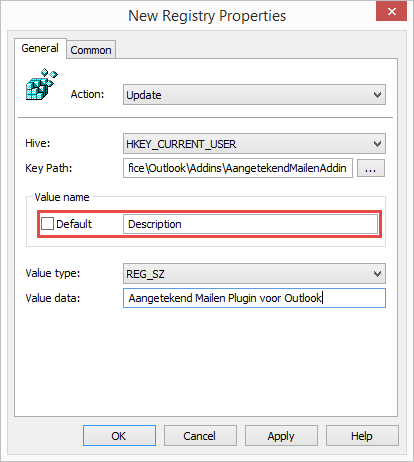
Image C:
Image D:

- After all the string values have been created, your screen will look like the following image:

Stap 4: Implementing the initial group policy object with test settings for Registered mail
In this step, you associate the Group Policy object with an organisational unit to apply it to the client computer that is a member of it.
Implementing the Registered Mail settings
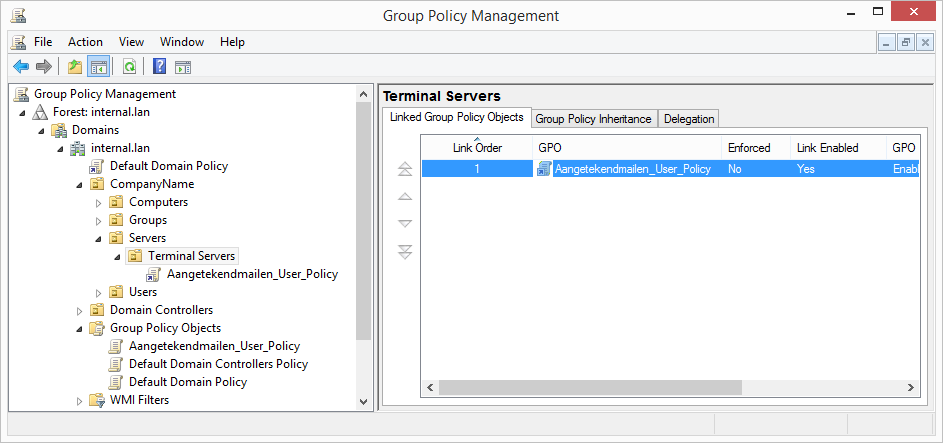
- On SVR-001, in Group Policy Management, right-click on Terminal Servers in the navigation pane and click on Link an existing Group Policy object.
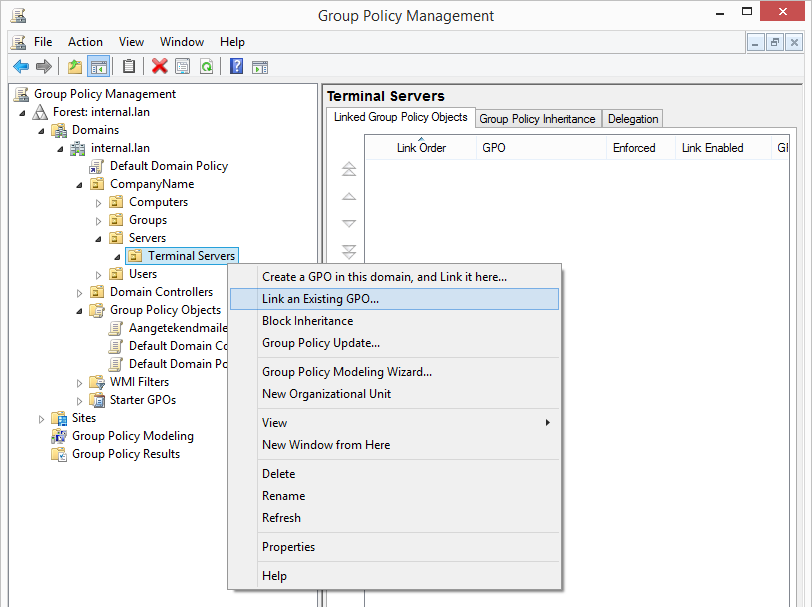
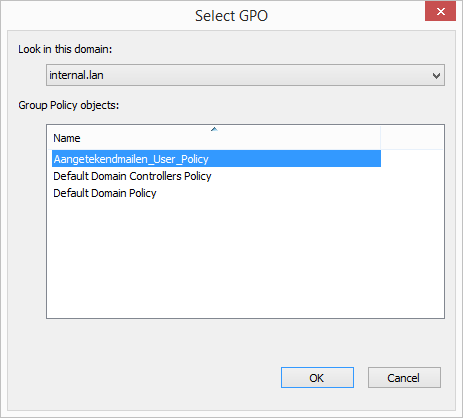
- In the Group Policy Objects list, click on Registered Mailing_User_Policy and click OK.


Configure plugin settings
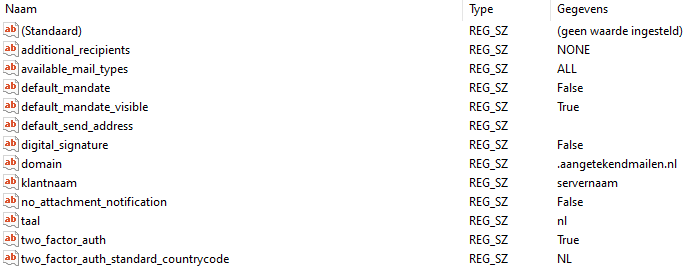
After deploying the plugin the user will see a one-time startup screen to configure the plugin settings. Entering the server name is essential to be able to use Registered E-mail.
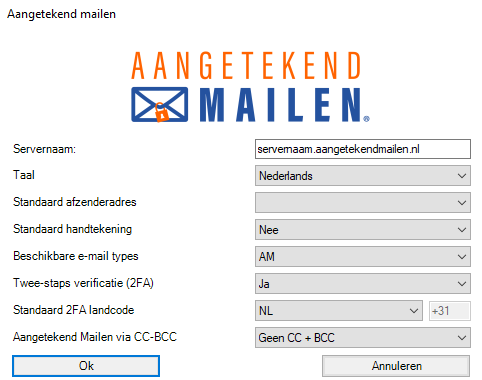
These values are stored in the register, so it is possible to set them in advance.
Go to, or create:
HKEY_CURRENT_USER\Software\AangetekendMailen
The following values can be entered:
Name (Type = REG_SZ) | Details |
additional_recipients | NONE |
| CC |
| BCC |
| ALL |
available_mail_types | AM |
| EIDAS |
| ALL |
default_mandate | False |
True | |
default_mandate_visible | False |
True | |
default_send_address | |
digital_signature | False |
| True |
domain | .aangetekendmailen.nl |
| .digitaalaangetekend.be |
| .recommandedigital.be |
| .digitaleinschreiben.de |
| .emailcertifie.fr |
| .emailcertificado.eu |
klantnaam | |
taal | nl |
| en |
| fr |
| de |
| es |
two_factor_auth | True |
| False |
Attachment_required | |
True | |
two_factor_auth_standard_countrycode | NL |
| BE |
| FR |
| EN |
| DE |
| ES |
A detailed explanation per key can be found in the document "Installation manual Registered Email".
Example: